
- December 7, 2025
The Ultimate Buttermilk Pancakes: Fluffy Perfection Every Time
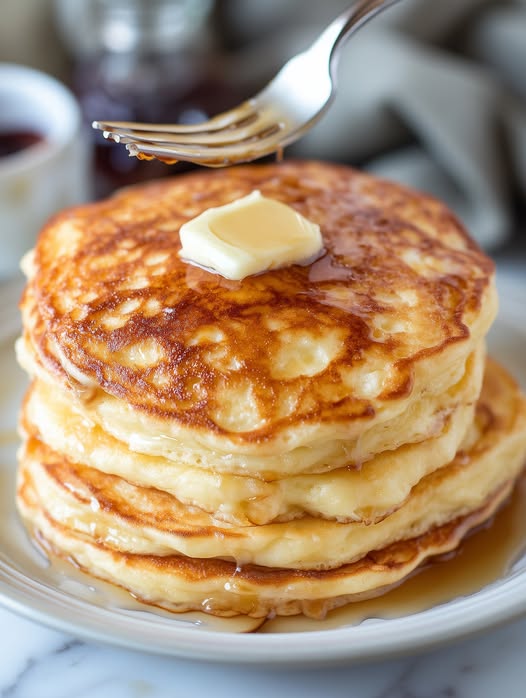
Say goodbye to boxed pancake mixes forever. This exceptional buttermilk pancake recipe delivers restaurant-quality results right in your own kitchen, creating impossibly fluffy, golden-brown pancakes that will become your family’s weekend tradition.
Why This Buttermilk Pancake Recipe Stands Above the Rest
Pancakes represent one of life’s simple pleasures, perfect for any meal of the day. Whether you’re serving them for a leisurely weekend breakfast, a quick weeknight dinner, or an elegant brunch gathering, these buttermilk pancakes never disappoint. The beauty of this recipe lies not just in its delicious results, but also in its versatility—you can customize these pancakes in countless creative ways to suit any taste preference.
The secret to achieving that perfect fluffy texture comes from the combination of buttermilk and sour cream, which creates a tender crumb while adding a subtle tang that balances the sweetness. Meanwhile, the careful balance of baking powder and baking soda ensures maximum lift, resulting in those picture-perfect tall, fluffy pancakes everyone dreams about.
Essential Ingredients for Perfect Pancakes
Dry Ingredients:
- 2 cups unbleached all-purpose flour (10 ounces)
- 2 tablespoons granulated sugar
- 1 teaspoon baking powder
- 1/2 teaspoon baking soda
- 1/2 teaspoon table salt
Wet Ingredients:
- 2 cups buttermilk
- 1/4 cup sour cream
- 2 large eggs
- 3 tablespoons unsalted butter, melted and slightly cooled
- 1-2 teaspoons vegetable oil (for cooking)
Step-by-Step Instructions for Flawless Pancakes
Preparing the Batter:
Begin by gathering two mixing bowls—one medium-sized for your dry ingredients and one smaller bowl for the wet components. In the medium bowl, combine your flour, sugar, baking powder, baking soda, and salt, whisking thoroughly to distribute the leavening agents evenly throughout the flour.
In your smaller bowl, crack the eggs and whisk them together with the buttermilk, sour cream, and melted butter. Make sure your melted butter has cooled slightly before adding it to prevent cooking the eggs. Whisk these wet ingredients until they’re well combined and smooth.
The Crucial Mixing Technique:
Here’s where many home cooks go wrong: create a well in the center of your dry ingredients, then pour in your wet mixture all at once. Using gentle whisking motions, combine the ingredients just until they come together. Your batter should remain lumpy—resist the temptation to smooth it out completely. Overmixing develops gluten in the flour, which leads to tough, rubbery pancakes instead of the tender, fluffy texture we’re after.
Once mixed, set your batter aside for exactly 10 minutes. This resting period allows the flour to fully hydrate and the leavening agents to begin working, resulting in lighter, fluffier pancakes.
Cooking to Golden Perfection:
Heat a 12-inch nonstick skillet over medium heat and add 1 teaspoon of vegetable oil. Once the oil begins to shimmer, use a paper towel to carefully wipe out most of the oil, leaving just a thin film coating the pan’s surface. This technique prevents greasy pancakes while ensuring they don’t stick.
Pour approximately 1/4 cup of batter for each pancake—you should be able to fit four pancakes in a 12-inch skillet. Watch for three telltale signs that your pancakes are ready to flip: the edges should appear set and dry, the bottom should be golden brown, and bubbles should just begin breaking on the surface. This typically takes 2 to 3 minutes.
Using a thin, wide spatula, carefully flip each pancake and cook for an additional 1 to 2 minutes until the second side achieves that same beautiful golden color. Continue this process with the remaining batter, adding a touch more oil to the pan as needed between batches.
Creative Topping Ideas to Elevate Your Pancakes
The topping possibilities are truly endless when it comes to these fluffy buttermilk pancakes. Classic maple syrup remains a timeless choice, but don’t limit yourself to tradition.
Sweet Additions: Fresh or frozen blueberries, sliced strawberries, or banana rounds can be folded into the batter or used as toppings. Consider warming fruit with a little butter and sugar to create a quick compote. Chocolate chips scattered over the batter just after pouring create pockets of melty chocolate throughout each pancake.
Creative Combinations: Try spreading peanut butter across warm pancakes and topping with chocolate chips for a protein-rich breakfast that tastes like dessert. Apple pie filling warmed and spooned over a stack creates an autumn-inspired treat. Fresh whipped cream, a dusting of powdered sugar, or a drizzle of honey each bring their own special touch.
Savory Twists: Don’t overlook savory possibilities—crispy bacon crumbled into the batter, a dollop of cream cheese, or even a fried egg on top can transform these pancakes into a satisfying savory meal.
Smart Storage Solutions for Meal Prep Success
One of the best features of this recipe is how well these pancakes freeze, making them perfect for busy mornings when you want a homemade breakfast without the effort.
Refrigerator Storage: After cooking, allow your pancakes to cool completely at room temperature. Store them in an airtight container or wrap them securely in plastic wrap. Properly stored pancakes will maintain their quality in the refrigerator for 4 to 5 days.
Freezer Storage for Long-Term Keeping: For longer storage, freezing is your best option. Layer cooled pancakes with squares of parchment or wax paper between each one—this prevents them from freezing together and allows you to remove only the number you need. Wrap the entire stack tightly in plastic wrap, then place in a freezer-safe bag or container. Frozen pancakes maintain excellent quality for up to 3 months.
Important Storage Note: Whether refrigerating or freezing, proper wrapping is crucial. Inadequately wrapped pancakes will dry out and develop an unpleasant texture, becoming hard and losing their fluffy character.


