
- December 7, 2025
🥟 Assembly Time: Creating the Pockets
-
Roll the Dough: On a lightly floured surface, roll out one of the chilled dough disks until it is about 1/8 inch (3 mm) thick.
-
Cut Shapes: Use a ruler and a knife (or a square/rectangle cookie cutter) to cut the dough into squares or rectangles (e.g., $4 \times 5$ inches). For the most efficient use of dough, try to cut straight lines and re-roll the scraps only once.
-
Fill: Place 2–3 generous tablespoons of the cool filling onto one half of each cut-out shape, leaving a clear 1/2-inch border all around. (Warning: Do not overfill! ⚠️)
-
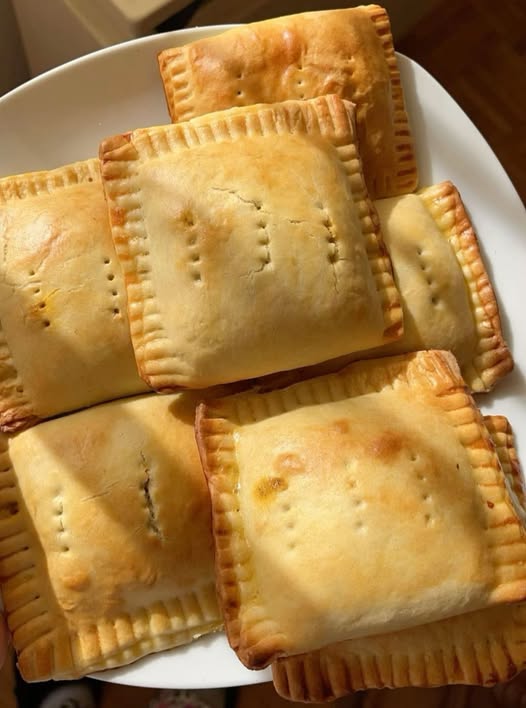
Seal: Brush the edges of the dough lightly with the egg wash (or just water). Fold the dough over the filling to create a pocket. Use a fork to crimp and seal the edges tightly (this creates the beautiful ridged pattern seen in the picture!).
-
Vent & Glaze: Cut 2-3 small slits (vents) on the top of each hand pie to allow steam to escape. Brush the entire surface with the egg wash for that characteristic golden, shiny finish! ✨
♨️ Part 3: Baking to Golden Perfection & Serving Tips 🍽️
This final section focuses on achieving that gorgeous, golden-brown crust and providing ideas for serving and storage.
🔥 Baking Instructions:
-
Preheat: Preheat your oven to 400°F (200°C). Position an oven rack in the center.
-
Prepare Baking Sheet: Line a large baking sheet with parchment paper 📜 or a silicone baking mat.
-
Final Chill (Pro Tip!): For the absolute best flakiness, place the assembled, egg-washed hand pies back in the refrigerator for 15–20 minutes before baking. This helps the butter firm up again!
-
Bake: Arrange the hand pies on the prepared baking sheet, ensuring they don’t touch. Bake for 20–25 minutes, or until the crust is deeply golden brown, puffed up, and the filling is bubbling (if savory) or slightly visible through the vents. The color in the user’s photo is the exact color you are looking for! 🏆
-
Cool: Carefully transfer the baked hand pies to a wire rack to cool slightly.
💡 Baker’s Tips for Success:
-
Keep it Cold: The colder the butter, the flakier the pie. If your kitchen is warm, chill the flour and even your mixing bowl before starting.
-
Don’t Overwork the Dough: Mix just until the dough comes together. Overworking develops the gluten too much, resulting in a tough, not flaky, crust. 🧱
-
Seal Tightly: Use a fork to press the edges firmly. If the seal isn’t tight, the filling will leak out, leading to a “blowout” pie.
-
Egg Wash is Key: Don’t skip the egg wash! It provides the irresistible gloss and golden color that makes these hand pies so appealing.
🥂 Serving Suggestions & Storage:
Savory Hand Pies:
-
Dipping Sauces: Serve hot or warm with ketchup, a side of rich brown gravy, or a spicy peri-peri sauce for a kick! 🌶️
-
Sides: Pair with a fresh, crisp side salad 🥗 for a balanced meal.
Sweet Hand Pies:
-
Toppings: Drizzle with a simple powdered sugar glaze 🍚 (confectioners’ sugar + milk) or serve à la mode with a scoop of vanilla ice cream 🍨.
-
Serving Temperature: Delicious warm, but easier to eat once cooled and set.
Storage:
-
Room Temperature: Can be kept in an airtight container for 1-2 days.
-
Refrigerated: Store for up to 5 days. Reheat in a toaster oven for maximum crispness!
-
Freezing: Assembled but unbaked hand pies freeze beautifully. Place them on a baking sheet until solid, then transfer to a freezer bag. Bake from frozen, adding about 10–15 minutes to the baking time. 🧊
This comprehensive recipe guarantees a batch of hand pies that will be the star of any table! Enjoy your baking journey! 🥳


