- December 5, 2025
🍮 Page 2: The Luxurious Date Filling & Assembly
The heart of these squares is the rich, sticky, and naturally sweet date filling. It provides a dense, chewy contrast to the crunchy topping. For the best flavor and texture, use good quality dates! 🌴
🛒 Ingredients for the Date Filling
-
2 cups (about 400g) Pitted Dates, Chopped 🔪 (Medjool or Deglet Noor are excellent choices!)
-
1 cup (240ml) Water 💧
-
½ cup (110g) Granulated Sugar
-
1 tablespoon Fresh Lemon Juice 🍋 (This brightens the flavor and prevents the mixture from becoming overly sweet!)
-
1 teaspoon Vanilla Extract (For warmth and aroma)
-
½ teaspoon Ground Nutmeg or Allspice (Adds complexity – feel free to skip if you prefer a simpler flavor)
📝 Instructions: Making the Filling
-
Simmer the Dates: In a medium saucepan, combine the chopped dates, water, granulated sugar, and lemon juice. Bring the mixture to a boil over medium heat, stirring occasionally.
-
Cook to a Jam: Once boiling, reduce the heat to low. Simmer the mixture for about 8–10 minutes, stirring frequently. The dates will soften, break down, and the mixture will thicken into a spreadable, jam-like paste. The consistency should be thick enough to hold its shape. 🥄
-
Finish the Filling: Remove the saucepan from the heat. Stir in the vanilla extract and nutmeg/allspice. Let the date filling cool down for about 5 minutes before assembling the bars.
🧑🍳 Assembling & Baking the Date Squares
-
Spread the Filling: Carefully and evenly spread the warm date filling over the pre-baked crumb base. Use an offset spatula to ensure the layer is smooth and reaches all the corners. 📐
-
Add the Crumb Topping: Evenly sprinkle the reserved crumb mixture over the date filling layer. Do not press it down—just let it sit lightly on top. This is what creates that beautiful, classic “crumb bar” look!
-
Final Bake: Return the pan to the oven and bake for an additional 25–30 minutes, or until the topping is a beautiful golden brown color and the filling is visibly bubbly. 🥳
-
Cool Completely: This is the most crucial step! The bars must be cooled completely on a wire rack before attempting to slice them. Cooling allows the filling to set and prevents the bars from falling apart. This can take 2 or more hours. For the cleanest cuts, you can even chill the cooled bars in the refrigerator for 30 minutes! ❄️
🥇 Page 3: The Golden Caramel Glaze & Finishing Touches
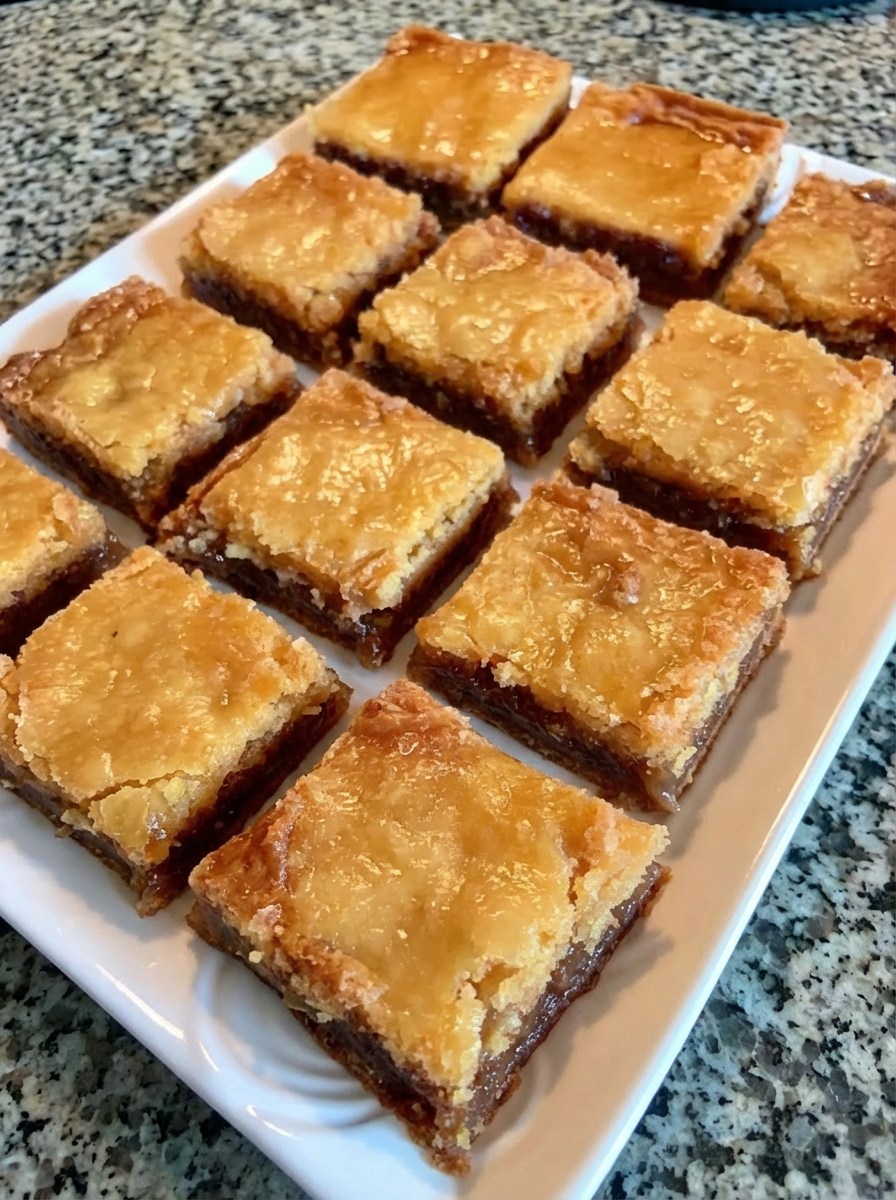
The feature that elevates these squares, as seen in the photo, is that gorgeous, shiny topping! While the bars are delicious on their own, the quick caramel glaze adds an irresistible final touch of sweetness and that signature glossy finish. ✨
🍯 Ingredients for the Caramel Glaze
-
½ cup (100g) Granulated Sugar
-
¼ cup (60ml) Heavy Cream (or Half-and-Half) 🥛
-
2 tablespoons Unsalted Butter 🧈
-
1 teaspoon Vanilla Extract
-
Pinch of Sea Salt 🌊 (Optional, but a great flavor booster!)
📝 Instructions: The Dazzling Caramel Glaze
-
Melt the Sugar: In a small, heavy-bottomed saucepan, heat the granulated sugar over medium heat. Do not stir initially! Allow the sugar to melt around the edges. As it begins to dissolve, gently swirl the pan or stir very occasionally with a heat-proof spatula.
-
Create Amber: Continue heating until the sugar is fully melted and transforms into a deep amber-colored liquid. Be careful not to let it burn! 🔥
-
Add Cream: Remove the pan from the heat. Carefully and slowly pour in the heavy cream. The mixture will bubble up vigorously! (Keep your face back!) Whisk constantly until the caramel is smooth.
-
Finish the Caramel: Whisk in the butter, vanilla extract, and a pinch of sea salt (if using) until the mixture is beautifully smooth and shiny. Allow the glaze to cool for a few minutes to thicken slightly, making it easier to drizzle and spread. 🥄
🔪 Slicing and Serving Your Masterpiece
-
Glaze & Set: Once the Date Squares are completely cool, drizzle or gently spread the warm (but not hot!) caramel glaze evenly over the top. The beautiful glaze will set as it cools, giving you that incredible, glossy finish captured in the picture! 🖼️
-
Cut Cleanly: Once the glaze is set, use the parchment paper overhang to lift the entire slab out of the pan. Place it on a cutting board. Use a sharp knife (running it under hot water and wiping it dry between cuts helps!) to slice the bars into perfect squares. The photo shows them cut into 12 squares (4 rows of 3). Pro Tip: Wipe the knife after every cut for the absolute cleanest edges. 🤩
-
Serve & Store: Arrange your gorgeous Caramel Date Squares on a serving platter and admire your handiwork! 👏
🧁 Storage & Serving Suggestions
-
Serving: These bars are wonderful at room temperature, perhaps with a scoop of vanilla ice cream 🍨 or a hot cup of tea 🫖.
-
Storage: Store leftover squares in an airtight container at room temperature for up to 3 days, or in the refrigerator for up to a week. For longer storage, freeze the unsliced bars (without the caramel glaze, or use a non-setting date-based caramel) for up to 3 months. Thaw in the refrigerator.
Enjoy your perfectly baked, chewy, and gloriously glossy Caramel Date Squares! 🎉
💖 SEO Keywords for Bakers:
-
Caramel Date Squares
-
Date Crumb Bars Recipe
-
Oatmeal Date Bars
-
Classic Date Squares
-
Easy Date Dessert
-
Homemade Caramel Glaze
-
Best Date Bar Recipe
-
Chewy Date Filling
-
Buttery Crumb Topping