
- December 6, 2025
Page 2: 👩🍳 Step-by-Step Baking Mastery: Creating the Perfect Apple Layer
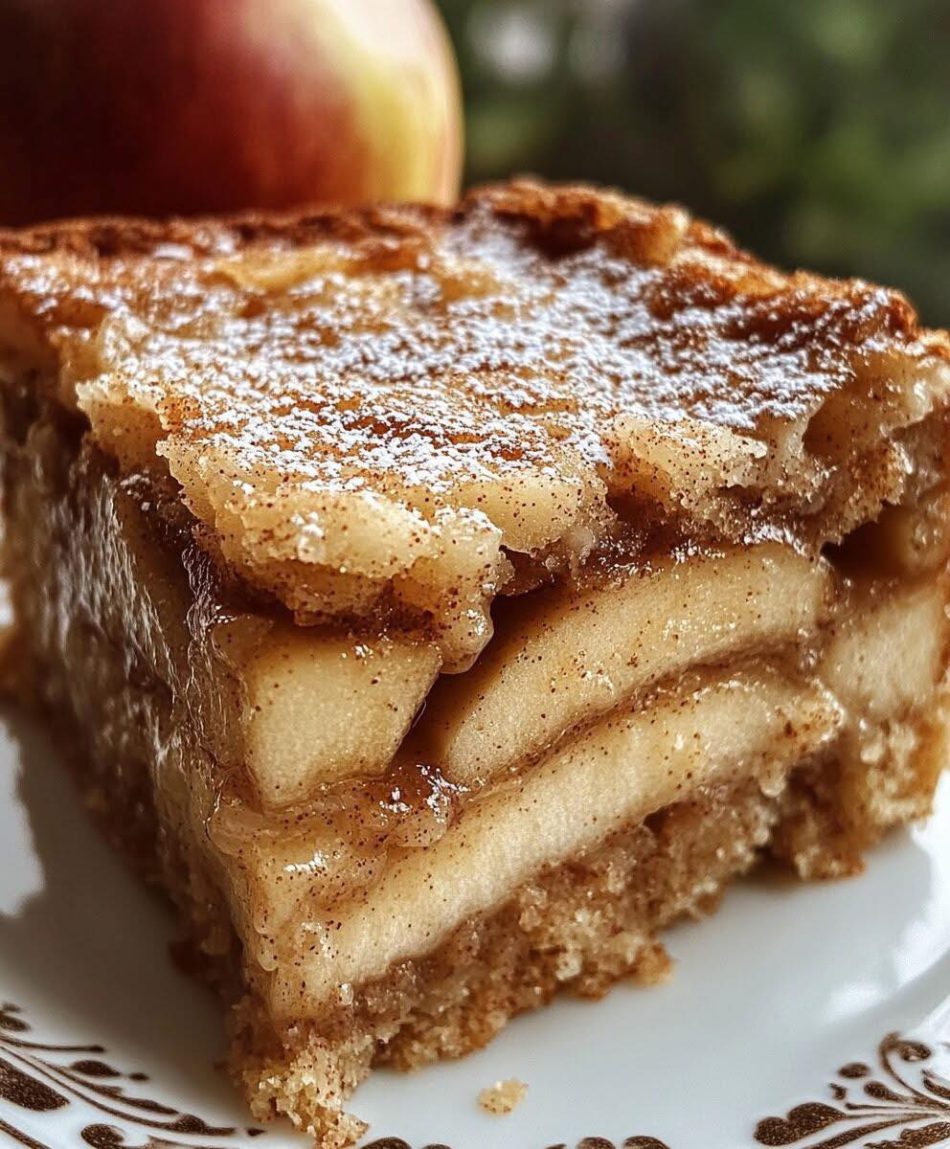
The key to a stunning slice like the one in the photo is the perfect distribution and tenderness of the apples. We’ll be creating layers of deliciousness!
🛠️ Preparation is Key: Getting Started
-
Preheat & Prep: Preheat your oven to $350^{\circ}\text{F}$ ($175^{\circ}\text{C}$). Lightly grease and flour a $9 \times 9$-inch square pan or a $9 \times 13$-inch rectangular pan (a rectangular pan will yield a flatter, quicker-baking cake like the one shown, adjust time accordingly). For easy removal, you can line the bottom with parchment paper and let the edges overhang. 📏
-
Apple Prep: Peel, core, and slice your apples. We want them thin enough to become tender while baking but thick enough to hold their shape—aim for that $\frac{1}{4}$-inch thickness. Set aside. 🔪
🥣 Crafting the Rich & Moist Cake Batter
-
Cream the Fats & Sugars: In a large bowl or stand mixer, beat the softened butter and granulated sugar together on medium-high speed until the mixture is light, pale, and fluffy (about $3-4$ minutes). This step is called “creaming” and incorporates air, which is vital for a tender crumb! 💨
-
Add the Eggs & Vanilla: Reduce the speed to medium. Beat in the eggs, one at a time, ensuring each egg is fully incorporated before adding the next. Scrape down the sides of the bowl as needed. Stir in the vanilla extract. The mixture might look slightly curdled—don’t worry, it’s normal! 🥚
-
Whisk the Dry Ingredients: In a separate medium bowl, whisk together the flour, baking powder, baking soda, salt, and $2$ teaspoons of ground cinnamon. Whisking them ensures the leavening agents are evenly distributed. 🌪️
-
Combine Wet and Dry: Gradually add the dry ingredient mixture to the wet mixture on low speed. Mix only until just combined. Overmixing will develop the gluten and result in a tough cake—we want it light and delicate! A few streaks of flour are acceptable at this stage. 🛑
layering for the Ultimate Slice
This technique is what makes the cake look so magnificent with its visible layers of fruit!
-
Base Layer: Scoop about half of the prepared cake batter into your pan and spread it out evenly with an offset spatula. This forms the foundation of the cake.
-
Apple Layer: Arrange about two-thirds of your apple slices over the base batter in a neat, overlapping pattern. Try to get a thick, even layer—don’t be shy! This is the core of the flavor. 🍎🍎
-
Middle Batter Layer: Gently dollop the remaining cake batter over the apples. Use your spatula to carefully spread the batter to the edges, trying not to disturb the apple layer too much. You may need to press slightly.
-
Top Apple & Spice Layer: Arrange the remaining one-third of the apple slices on top of the final batter layer.
-
Cinnamon-Sugar Topping: In a small bowl, whisk together the $\frac{1}{4}$ cup of sugar and $1$ tablespoon of cinnamon. Generously sprinkle this mixture over the top layer of apples and batter. This will create a beautiful, caramelized, and slightly crunchy finish! ✨
Page 3: 🔥 Baking, Cooling, and Serving: The Grand Finale & SEO Tips!
We are in the home stretch! The aroma filling your kitchen will be pure heaven.
⏱️ The Bake Time: Patience is a Virtue
-
Into the Oven: Place the prepared pan in the preheated $350^{\circ}\text{F}$ ($175^{\circ}\text{C}$) oven.
-
Baking Time: Bake for approximately $50-65$ minutes. Since the apple layer is thick, it needs a little longer than a standard cake.
-
Checking for Doneness: The cake is done when the topping is golden brown, the edges are pulling away slightly from the pan, and a wooden skewer or toothpick inserted into the center of the cake (not just an apple slice) comes out clean or with a few moist crumbs attached. If the topping starts to brown too quickly, loosely tent the cake with aluminum foil. 🌡️
❄️ The Essential Cooling Process
-
Resting: Once baked, remove the cake from the oven and place it on a wire cooling rack. Let it cool in the pan for at least $20-30$ minutes. This allows the structure to set and the apple juices to redistribute.
-
Finishing Touches: If you lined the pan with parchment paper, lift the cake out onto the wire rack to cool completely. If you prefer the look in the image, wait until the cake is fully cooled before slicing and serving.
-
Serving Suggestion (The Picture Look!): Before serving, dust the top generously with powdered sugar (icing sugar) for that iconic, snowy finish. Serve warm with a scoop of vanilla ice cream 🍨 or a dollop of whipped cream for the ultimate treat!
📝 Expert SEO Tips for Your Food Blog or Social Post
To make this recipe pop online, focus on these descriptive, searchable terms:
-
Primary Keywords: Homemade Apple Cake, Moist Apple Dessert, Cinnamon Crumble Topping.
-
Long-Tail Keywords: How to make moist apple cake with cinnamon sugar topping, Easy square apple cake recipe for fall, Best-ever layered apple cake for Thanksgiving.
-
Descriptive Language (Use in your post!): Golden-brown, Caramelized, Tender and Juicy Apples, Aromatic Spices, Cozy Autumn Treat.
-
Use Emojis: 🍎🍰✨🤤🍂 (As you can see, emojis draw attention!)
Enjoy your spectacular Moist Layered Apple Cake! It’s the perfect centerpiece for any gathering. Happy baking! 🥳


