
🥥 No-Bake Strawberry Coconut Cream Pie
Tropical Dreams: Cool, Creamy, and Perfectly Sweet
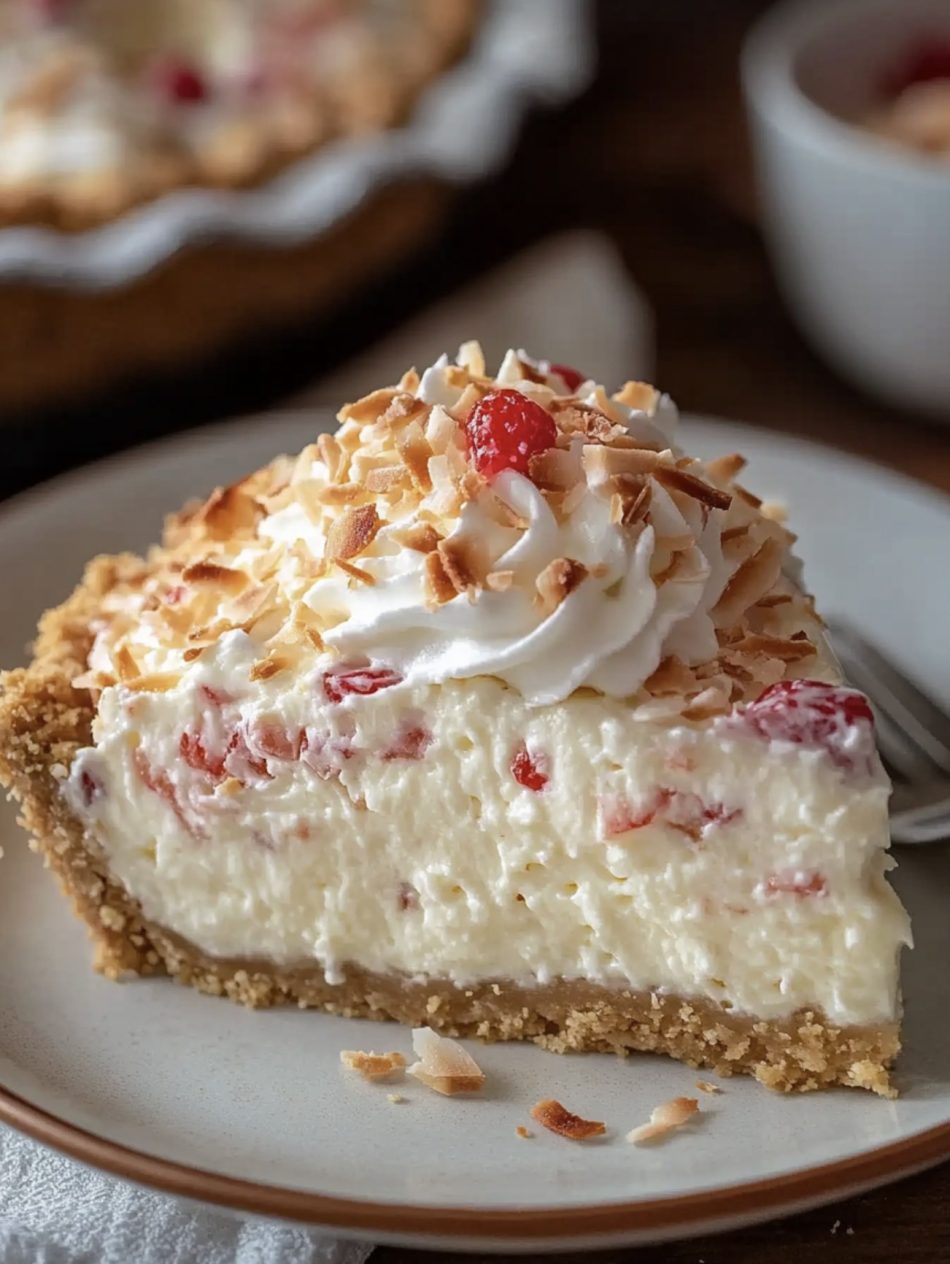
Indulge in this delightful No-Bake Strawberry Coconut Cream Pie! This dessert is the definition of effortless elegance. It features a buttery graham cracker crust, a light and fluffy cream cheese filling studded with sweet strawberries, and a crowning glory of whipped cream and toasted coconut flakes—just like the gorgeous slice in the photo.
Perfect for summer gatherings, BBQs, or whenever you need a stunning dessert without turning on the oven, this pie is guaranteed to be a refreshingly sweet hit! It’s creamy, crunchy, and packed with tropical flavor.
🎯 Key Recipe Highlights
-
Prep Time: 20 minutes
-
Chill Time: 4 hours (minimum)
-
Total Time: 4 hours 20 minutes
-
Yields: 8 generous slices
-
Cuisine: American (No-Bake Dessert)
-
Method: No-Bake/Refrigerated
🛒 Ingredients You Will Need
I. For the Graham Cracker Crust
-
1.5 cups Graham Cracker Crumbs: Can substitute with vanilla wafer or shortbread crumbs.
-
¼ cup Granulated Sugar: Sweetens the crust.
-
½ cup (1 stick / 115g) Unsalted Butter, melted: Binds the crumbs.
II. For the Creamy Filling
-
8 oz Cream Cheese, fully softened: The rich, creamy base.
-
1 can (14 oz / 400g) Sweetened Condensed Milk: Adds sweetness and prevents the need for cooking.
-
1 teaspoon Pure Vanilla Extract: For flavor depth.
-
2 tablespoons Lemon or Lime Juice (freshly squeezed): Adds a slight tang to cut the richness.
-
1 cup Fresh Strawberries, finely chopped (or maraschino cherries): The visible red fruit pieces.
-
½ cup Shredded Coconut (sweetened or unsweetened): Adds moisture and flavor to the filling.
III. For the Topping
-
1 cup Heavy Whipping Cream: For the fluffy topping.
-
2 tablespoons Powdered Sugar (Confectioners’ Sugar): Sweetens the whipped cream.
-
½ cup Shredded Coconut, toasted: For the beautiful, crunchy garnish (as pictured).
-
Maraschino Cherries or extra Strawberry pieces: For final decoration.


