
- December 5, 2025
🛠️ Step-by-Step Instructions (The Magic Happens Here!)
Follow these simple steps for perfect, ooey-gooey results every time! 🎯
Phase 1: Creating the Fudgy Brownie Batter
-
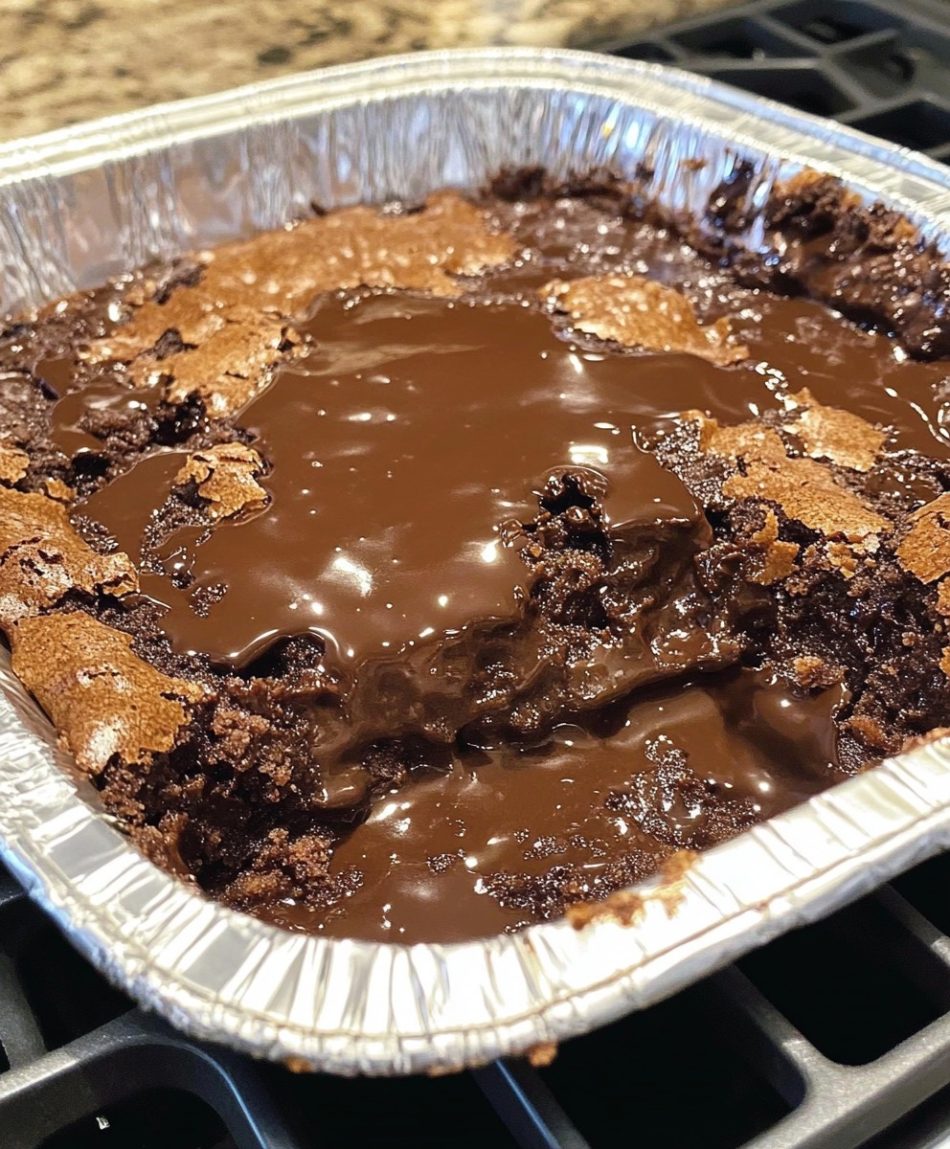
Preheat & Prep: Preheat your oven to 350°F (175°C). Grease and line an 8×8 inch square baking pan (or a similar-sized foil pan, as shown in the picture! 🖼️).
-
Melt Butter: In a large, microwave-safe bowl or a saucepan over low heat, melt the 1 cup of butter. Remove from heat.
-
Mix Sugars & Cocoa: Whisk in the granulated sugar, brown sugar, and cocoa powder into the melted butter until fully combined. This step “blooms” the cocoa, intensifying the flavor! 👃
-
Add Eggs & Vanilla: Whisk in the vanilla extract. Add the eggs one at a time, beating vigorously for about 30 seconds after each addition. This is key to achieving that beautiful, crackly crust! 💥
-
Fold in Dry Ingredients: Gently fold in the flour and salt using a rubber spatula until just combined. DO NOT OVERMIX! Overmixing develops gluten and leads to cakey, not fudgy, brownies. 🚫
-
Add Chips (Optional): Fold in the ½ cup of chocolate chips if using.
-
Spread Batter: Pour about 2/3 of the brownie batter into your prepared pan and spread it evenly. Reserve the remaining 1/3 of the batter.
Phase 2: Making the Silky Lava Center (Quick Ganache)
-
Heat Cream: In a small saucepan, gently heat the ½ cup of heavy cream until it just begins to simmer around the edges (or microwave for about 45 seconds). 🔥
-
Combine: Place the 1 cup of chopped chocolate/chocolate chips in a small bowl. Pour the hot cream over the chocolate. Let it sit for 5 minutes without stirring. ⏱️
-
Stir Ganache: Whisk the mixture until it is completely smooth and glossy. This is your luscious, molten ganache center! ✨
Phase 3: Assembling and Baking
-
Pour Lava: Carefully pour the prepared chocolate ganache over the top of the brownie batter in the pan, spreading it to cover the center, leaving a small border of batter around the edges.
-
Add Remaining Batter (The Swirl): Dollop spoonfuls of the remaining 1/3 of the brownie batter over the top of the ganache. You don’t need to cover it completely—it will melt and spread as it bakes, creating that beautiful, marbled, and molten effect you see in the photo! 😍
-
Bake: Bake in the preheated oven for 25–35 minutes.
-
The Key Test: The edges should look set and the top should be cracked. A toothpick inserted into the edge should come out with moist crumbs. A toothpick inserted into the center should still come out covered in molten chocolate. DO NOT OVERBAKE! 🛑 The center needs to be gooey!
-
-
Cool (Barely!): Let the brownies cool for only about 10-15 minutes before serving warm. The molten center will solidify as it cools, so serve it while it’s hot for the best lava effect! 🌡️
💡 Baker’s Tips & Tricks for Perfection
-
Go for Dark Chocolate: Using a high-quality dark chocolate (70% cocoa) for the ganache center will provide a fantastic flavor contrast to the sweet brownie. 🖤
-
Room Temperature Eggs: Cold eggs can seize up the butter mixture. Always use room temperature eggs for a smoother, better-emulsified batter. ☀️
-
The Foil Pan Secret: Baking in a metallic or foil pan (like the one pictured) often results in crispier edges, which is a wonderful texture contrast to the soft center! 🥣
-
The Ganache Alternative: If you want a super quick version, you can skip the ganache and instead press a whole block of your favorite chocolate (like a 4oz bar) into the center of the batter before baking! 🍫🧱
🌈 Variations to Elevate Your Brownies
-
Salted Caramel Drizzle: Before serving, drizzle with a homemade salted caramel sauce and a sprinkle of flaky sea salt. 🌊🧂
-
S’mores Delight: Add a layer of graham cracker crumbs to the bottom of the pan, and top the molten center with mini marshmallows during the last 5 minutes of baking. 🔥⛺
-
Peanut Butter Swirl: Swirl a few spoonfuls of melted peanut butter into the ganache before covering it with the final batter dollops. 🥜
-
Spicy Kick: Add ½ teaspoon of chili powder or cayenne pepper to the dry ingredients for a subtle Mexican Hot Chocolate twist! 🌶️
❓ F.A.Q. (Frequently Asked Questions)
Q: Why didn’t my brownies get that crackly top?
A: The crackly top is often achieved by vigorously whisking the eggs and sugar/butter mixture until it becomes slightly lighter in color and thicker (about 2-3 minutes of good whisking). The rapid creation of an egg-sugar meringue on the surface is what causes the signature crinkle!
Q: Can I prepare these ahead of time?
A: These are best served warm to ensure the center is perfectly molten. However, you can bake them 1-2 days ahead and reheat individual slices in the microwave for 20-30 seconds just before serving. 🔃
Q: What should I serve with these?
A: The traditional (and best!) way is with a scoop of vanilla bean ice cream 🍦 or a dollop of fresh whipped cream and a few fresh raspberries! 🍓 Heaven!
Happy Baking! 🎉 These Fudgy Molten Lava Brownies are guaranteed to be a new favorite. Don’t forget to tag your creations! 📸 Enjoy the pure, unadulterated joy of hot, melted chocolate! 😋


