- December 7, 2025
Step-by-Step Preparation Guide
Preparing Your Pasta:
Start by bringing a large pot of salted water to a rolling boil. Add your jumbo shell pasta and cook according to package directions until they reach al dente texture—tender yet still slightly firm to the bite. This texture is crucial because the shells will continue cooking slightly in the oven. Overcooking at this stage results in shells that tear or become mushy during stuffing.
Once cooked, drain the shells thoroughly in a colander. Immediately rinse them under cold running water—this stops the cooking process and prevents the shells from sticking together. Spread them out on a clean kitchen towel or baking sheet to continue cooling while you prepare the filling.
Creating the Filling:
While your pasta cooks, preheat your oven to 350°F. This ensures it’s at the perfect temperature when your shells are ready to bake.
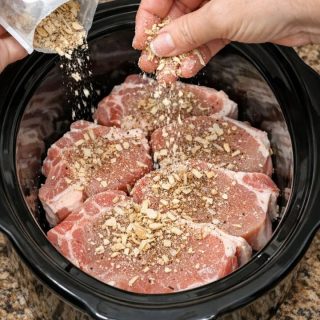
Place a large skillet over medium-high heat and add your ground beef. Break it apart with a wooden spoon or spatula as it cooks, stirring frequently to ensure even browning. Continue cooking until no pink remains and the meat is thoroughly cooked through. Drain any excess fat from the skillet—this step keeps your filling from being greasy.
Add the minced garlic to your cooked beef and sauté for just 30 seconds. Garlic burns quickly, so this brief cooking time is all you need to release its aromatic flavor without bitterness.
Building Flavor:
Now comes the transformation that turns simple ground beef into something spectacular. Add your taco seasoning packet, cream cheese, and salsa to the skillet with your beef and garlic. Stir everything together, breaking up the cream cheese as it begins to melt. Continue stirring until the cream cheese completely incorporates into the mixture, creating a creamy, cohesive filling. The cream cheese adds richness and helps bind everything together, while the salsa contributes moisture and bright, fresh flavor.
Once fully combined, remove the skillet from heat and allow the mixture to cool slightly. This cooling period makes the filling easier to handle during stuffing and prevents the shells from becoming too soft from the heat.
Assembly:
Prepare a 9×13-inch baking dish by greasing it well with cooking spray or butter. This prevents sticking and makes serving easier later.
Now for the fun part—stuffing your shells! Take a cooled pasta shell and generously fill it with the taco meat mixture. Don’t be shy with the filling; each shell should be packed full but not overflowing. Arrange the stuffed shells in your prepared baking dish, nestling them close together. Depending on shell size and how generously you stuff them, you should be able to fit approximately 20-24 shells in a standard 9×13 dish.
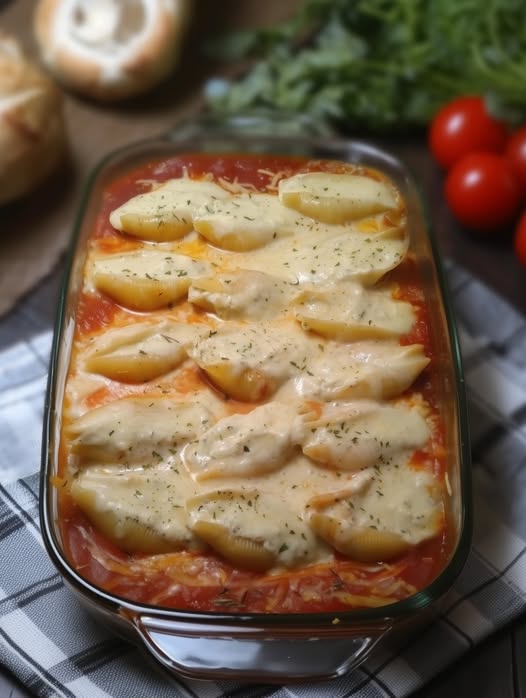
Once all shells are arranged, shower them with your shredded taco blend cheese. This top layer creates that irresistible golden, bubbly crust everyone loves.
Baking to Perfection:
Slide your assembled dish into the preheated oven and bake for 15-20 minutes. You’ll know they’re ready when the cheese melts completely, turns golden at the edges, and starts bubbling enthusiastically. The shells should be heated through and the filling should be steaming hot.
Final Touches:
Remove from the oven and garnish immediately with freshly chopped green onions. The bright color and fresh, mild onion flavor add the perfect finishing touch. Serve these beauties hot from the oven for maximum cheesy deliciousness.
Storage Solutions for Meal Planning Success
Refrigerator Storage:
These Taco Stuffed Shells are perfect for meal prep and leftovers. After cooking, allow the dish to cool completely to room temperature—leaving it out for about 30 minutes does the trick. Transfer cooled shells to an airtight container and refrigerate. Properly stored, they’ll maintain their quality for up to 3 days, giving you easy lunches or quick dinners throughout the week.
Freezer Storage:
For longer-term storage, these shells freeze beautifully. You can freeze them before or after baking, depending on your preference.
To freeze unbaked shells, assemble the dish completely but don’t add the cheese topping. Cover tightly with plastic wrap, then wrap again with aluminum foil. Label with the date and freeze for up to 3 months. When ready to serve, thaw overnight in the refrigerator, add the cheese topping, and bake as directed.
To freeze cooked shells, cool them completely first. Portion into freezer-safe containers, leaving a bit of space at the top for expansion. These will keep for 3 months. Thaw overnight in the refrigerator before reheating.
Reheating for Best Results
Oven Method:
The oven delivers the best reheating results, maintaining the shells’ texture while heating everything through evenly. Preheat your oven to 350°F. Place the shells in an oven-safe dish, cover loosely with foil to prevent the cheese from over-browning, and heat for 15-20 minutes until steaming hot throughout.
Microwave Method:
For quicker reheating, the microwave works in a pinch. Place desired portions on a microwave-safe plate and heat on medium power in 1-minute intervals, checking and stirring between intervals, until heated through. While faster, this method may result in slightly softer shells compared to the oven method.
Creative Variations to Try
Chicken Taco Shells: Swap ground beef for shredded rotisserie chicken or ground chicken for a lighter option. Season with the same taco seasoning for consistent flavor.
Vegetarian Version: Replace the beef with black beans, pinto beans, or a meat substitute. Add sautéed bell peppers, corn, and onions for extra texture and flavor.
Spicy Kick: Use hot salsa instead of mild, add diced jalapeños to the filling, or mix in some cayenne pepper with the taco seasoning.
Cheese Lovers: Mix shredded cheese directly into the meat filling for extra cheesy goodness, or try different cheese combinations like Monterey Jack, pepper jack, or sharp cheddar.
Green Chile Version: Substitute salsa verde for regular salsa and add diced green chiles to the filling for a tangy, southwestern twist.
Pro Tips for Perfect Results
Shell Selection: Choose high-quality jumbo shells—store brands work fine, but make sure they’re fresh. Old pasta can become brittle and difficult to stuff without breaking.
Don’t Overcook the Pasta: Al dente is crucial here. Test a shell a minute or two before the package directions suggest—it should be tender but still hold its shape firmly.
Cooling Matters: Rinsing shells in cold water isn’t just about preventing sticking—it also makes them easier to handle during the stuffing process.
Stuffing Technique: Use a spoon or small cookie scoop to fill shells neatly. Hold each shell