- December 4, 2025
🛒 Ingredients You Will Need
For the best results, use good quality chocolate chips and real sweetened condensed milk.
-
12 oz (340g) Quality Chocolate Chips: Use Semi-Sweet or a mix of Semi-Sweet and Milk Chocolate chips for a sweeter flavor. Dark chocolate chips (70% cacao or higher) will give a richer, less sweet fudge.
-
1 can (14 oz / 400g) Sweetened Condensed Milk: Crucial Note: Do not confuse this with evaporated milk. Sweetened condensed milk is thick and sticky, which is what gives the fudge its structure.
-
1 teaspoon Pure Vanilla Extract: For depth of flavor.
-
½ teaspoon Sea Salt (Optional): Balances the sweetness and enhances the chocolate flavor.
-
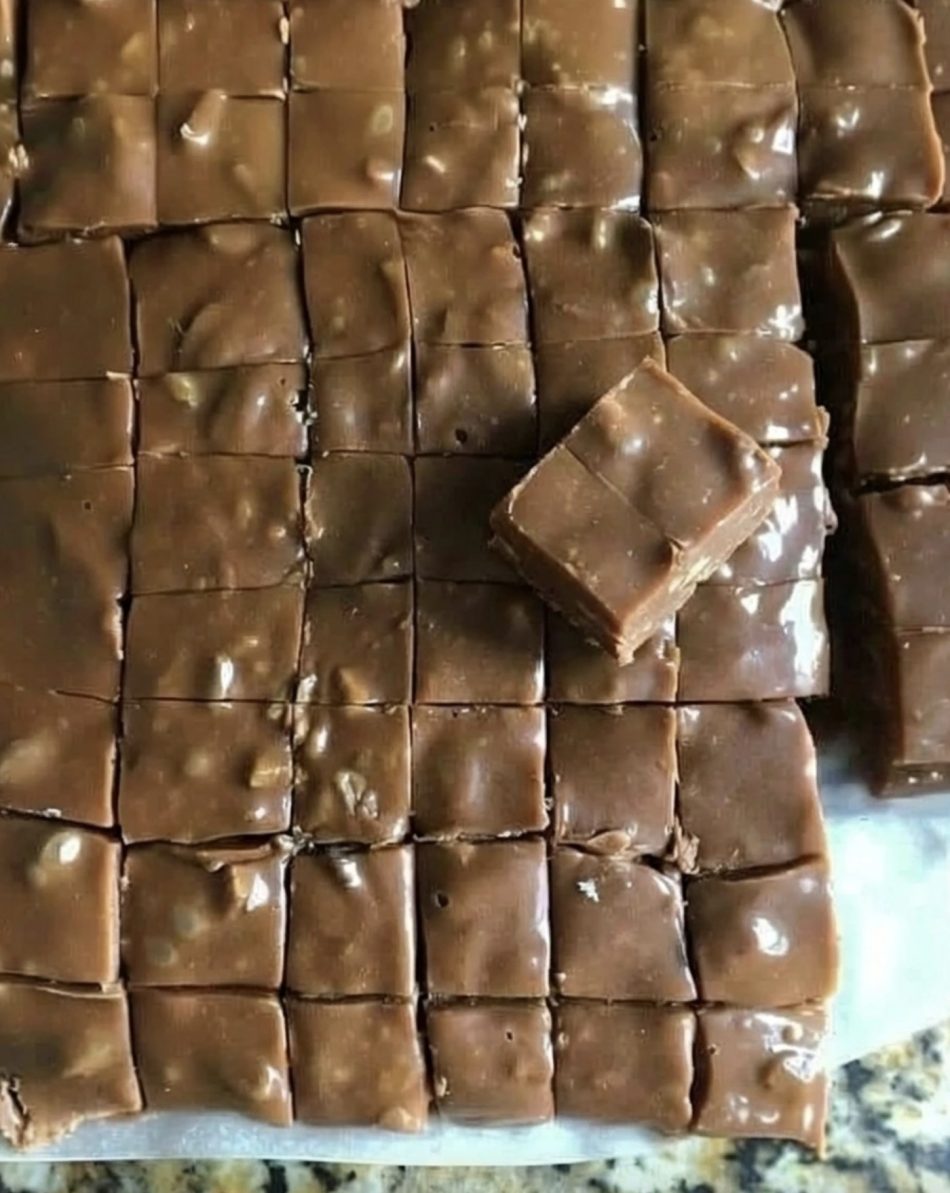
¾ to 1 cup Chopped Nuts: Pecans or Walnuts are traditional, but Peanuts are also excellent (as suggested by the visual). Chop them roughly for a good texture. You can toast them lightly before adding for an intensified flavor!
📝 Step-by-Step Instructions
Follow these simple steps for perfect, creamy fudge every time.
Step 1: Prepare Your Pan
-
Line an 8×8-inch square baking pan with parchment paper or aluminum foil. Leave an overhang on two sides to easily lift the finished fudge out of the pan. Lightly grease the pan first (a tiny bit of butter or cooking spray) to help the paper stick.
Step 2: Melt the Chocolate Mixture
-
In a medium, microwave-safe bowl (or a saucepan for the stovetop method), combine the chocolate chips and the entire can of sweetened condensed milk.
-
Microwave Method: Heat on high power for 30-second intervals, stirring vigorously after each interval. Continue until the mixture is smooth, glossy, and all the chips are fully melted and combined (usually 1.5 to 2 minutes total).
-
Stovetop Method: Place the bowl/saucepan over low heat, stirring constantly until the chocolate is fully melted and the mixture is completely smooth and shiny. Be careful not to overheat.
Step 3: Add Flavor and Crunch
-
Remove the bowl from the heat.
-
Stir in the vanilla extract, sea salt (if using), and the chopped nuts. Mix until the nuts are evenly distributed throughout the rich chocolate base.
Step 4: Set and Chill
-
Quickly pour the mixture into the prepared 8×8-inch pan. Use a spatula to spread it evenly and smooth the top.
-
Optional: Sprinkle a few extra chopped nuts on top and press them in lightly.
-
Cover the pan loosely with plastic wrap or the overhanging parchment paper.
-
Refrigerate for a minimum of 2 hours, or until the fudge is completely firm and set.
Step 5: Slice and Serve
-
Once firm, use the parchment paper overhang to lift the entire block of fudge out of the pan and place it on a cutting board.
-
Using a large, sharp knife, cut the fudge into 1-inch squares (this should yield about 36 pieces). Tip: For super clean cuts, wipe your knife clean between slices.
💡 Pro Tips for Perfect Fudge
-
Choosing Your Chocolate: Milk chocolate yields a sweeter, softer fudge, while semi-sweet provides a deeper chocolate flavor. Experiment with what you like best!
-
Microwave Control: Chocolate can seize up if overheated. Using short, 30-second bursts and stirring thoroughly between each is the key to a silky-smooth finish.
-
Storage: Store the chocolate nut fudge in an airtight container in the refrigerator for up to 2 weeks. You can also freeze it for longer storage (up to 2 months), thawing it in the fridge before serving.
-
Customization: Feel free to swap the nuts for dried fruit, mini marshmallows (for a rocky road effect), or sprinkle the top with sea salt flakes for a salted chocolate fudge twist!