🥔 The Ultimate Guide to Extra-Crispy Homemade Potato Chips: A Gourmet Snack Experience
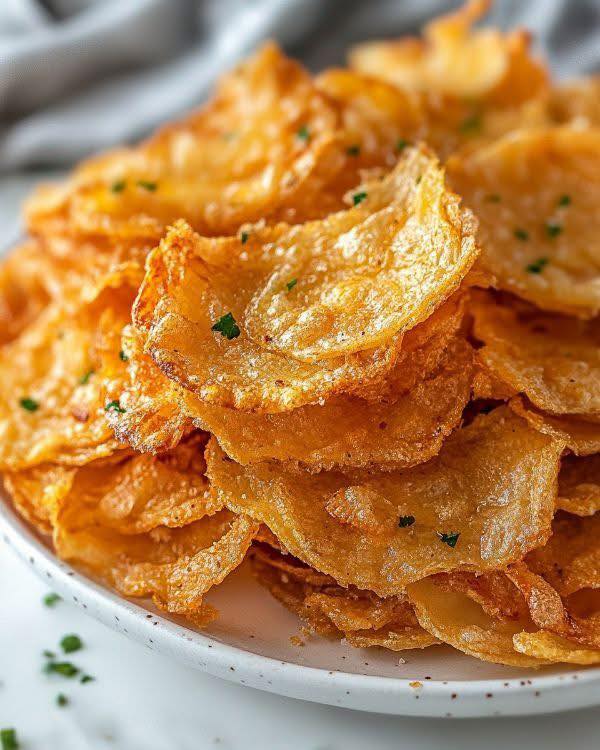
Welcome to the world of truly homemade potato chips! Forget the bags from the store—nothing compares to the irresistible crunch, golden hue, and fresh, savory flavor of chips made right in your own kitchen. This comprehensive, three-page guide will walk you through every critical step, from selecting the perfect potato to achieving that enviable, light, and airy texture you see in the image.
Making phenomenal potato chips is a culinary process that requires precision, patience, and attention to detail. We’ll delve into the science of starch removal and the art of temperature control to ensure your chips are not just good, but perfectly crispy every single time. Get ready to elevate your snacking game!
Page 1: The Foundations of the Perfect Chip – Ingredients, Prep, and Starch Control
The secret to a light, golden, and shatteringly crisp potato chip lies in the preparation. We must minimize the starch and moisture content before frying to prevent sticking, burning, and a dull texture.
1. Essential Ingredients and Equipment
Choosing the right ingredients and tools is the first step toward chip perfection.
| Ingredient | Quantity | Notes |
| Russet or Idaho Potatoes | 4-5 medium (approx. 2 lbs / 900g) | High-starch potatoes yield the crispiest results. They are the industry standard. |
| Frying Oil | 6-8 cups (approx. 1.5 – 2 Liters) | High smoke point oil like Peanut Oil, Canola Oil, or Vegetable Oil is crucial for deep frying. |
| Kosher Salt | To taste | Use fine-grain salt for optimal adherence to the chip surface. |
| Distilled White Vinegar (Optional) | 2 Tablespoons | Adding vinegar to the soaking water can help the potatoes retain their shape and firmness, resulting in a cleaner chip. |
Key Equipment:
-
Mandoline Slicer: Non-negotiable for uniform, paper-thin slices (ideally $1/16$ to $1/32$ inch thick). Even slices cook evenly, which is essential for uniform crispness.
-
Large Dutch Oven or Deep Pot: For safe deep-frying with ample room for the oil and chips.
-
Deep-Fry Thermometer: Critical for maintaining a consistent oil temperature.
-
Wire Mesh Spider or Slotted Spoon: For safely handling and removing the chips.
-
Large Bowls: For soaking the potato slices.
2. The Art of Slicing (The Crispy Secret)
The thickness of your slices dictates the final texture of the chip.
-
Prep the Potatoes: Peel the potatoes (optional, but recommended for a cleaner look) and rinse them well.
-
Slice Thinly and Evenly: Using your mandoline slicer, slice the potatoes as thinly as possible (aim for $1/16$ inch or less). As you slice, immediately drop the potato rounds into a large bowl of ice-cold water to prevent oxidation (browning).
3. Starch Removal: The Path to Ultra-Crispness
Potatoes are loaded with starch. If this starch remains on the surface, it will cause the chips to stick together, burn prematurely, and result in a chewy, less-than-crispy texture.
-
First Soak: Let the potato slices soak in the initial bowl of cold water for at least 30 minutes. You will notice the water becoming cloudy.
-
Rinse and Repeat: Drain the cloudy water. Refill the bowl with fresh, cold water. Gently agitate the slices. Repeat this process (3 to 4 times) until the water remains nearly clear. This indicates that most of the surface starch has been removed.
-
Optional Vinegar Bath: For an even better result, drain the water one last time and add 2 quarts of fresh water along with 2 tablespoons of white distilled vinegar. Soak for another 10 minutes. The acid helps reinforce the cell walls of the potato, leading to a firmer chip that holds its shape better in the hot oil.
Page 2: Moisture Management and The Frying Masterclass
The next most crucial factor after starch removal is moisture control. Any residual water on the potatoes will cause the oil to splatter violently and dramatically lower the oil temperature, leading to soggy, oily chips.
4. The Critical Drying Phase
This step is absolutely vital for crispiness. Do not skip or rush the drying process!
-
Drain Thoroughly: Drain the potato slices completely from the final water/vinegar bath.
-
First Pat-Down: Spread the slices out over several layers of clean, absorbent paper towels or a clean kitchen towel.
-
The Final Dry: Place another clean towel or more paper towels over the top and gently but firmly pat the slices until they are bone-dry.
-
Pro Tip: For maximum dryness, let the fully patted-down slices air-dry on a wire rack or clean, dry towel for an additional 10-20 minutes. The drier the chip, the crispier the result.
-
5. Mastering the Fry Temperature
Consistent oil temperature is the difference between a golden chip and a greasy one.
-
Heat the Oil: Pour the frying oil into your deep pot or Dutch oven, ensuring it is at least 3-4 inches deep. Attach your deep-fry thermometer to the side.
-
Target Temperature: Slowly heat the oil to the ideal frying temperature of $325^{\circ}\text{F}$ ($163^{\circ}\text{C}$). Frying at a slightly lower temperature (compared to French fries) allows the chips to fully dehydrate and cook through before they brown.
-
Batch Frying is Key: Do not overcrowd the pot. Work in small batches. Crowding the oil will cause the temperature to drop too rapidly, resulting in soggy chips. A small batch should cover the surface of the oil without stacking.
6. The Frying Process
This is where the magic happens!
-
Add and Stir: Gently lower a small batch of dried potato slices into the hot oil. They will initially sink.
-
Constant Movement: Immediately begin stirring and flipping the chips gently with your wire mesh spider. This ensures even cooking and prevents them from sticking together.
-
Cook Until Dehydrated: The chips will go through a few phases:
-
Phase 1 (2-4 minutes): Bubbling will be vigorous as the water boils off. The chips will look pale and slightly translucent.
-
Phase 2 (4-8 minutes): Bubbling will slow down significantly. This is the dehydration phase. The chips will begin to stiffen and turn a light golden color.
-
Phase 3 (8-10 minutes): When the bubbling stops almost entirely and the chips have achieved a uniform golden-brown color, they are done. Remove them immediately to prevent burning.
-
-
Temperature Management: Between batches, allow the oil to return to the target temperature of $325^{\circ}\text{F}$ ($163^{\circ}\text{C}$) before adding the next batch.