


- May 31, 2026
Step-by-Step Instructions
Step 1: Mix the Dry Base
In a large mixing bowl, combine your fine almond flour, psyllium husk powder, baking powder, and sea salt. Use a dry whisk to stir the mixture thoroughly, ensuring there are absolutely no clumps left. Breaking up the clumps now guarantees an even texture throughout the loaf later.
Step 2: Hydrate the Dough
Pour the warm water and the splash of apple cider vinegar directly into your dry mixture. Grab a sturdy wooden spoon or a silicone spatula and stir vigorously. At first, it might look a bit too wet, but within 30 to 60 seconds, the psyllium husk will absorb the liquid completely, transforming the mixture into a thick, pliable, slightly sticky dough.
Step 3: Shape and Rest
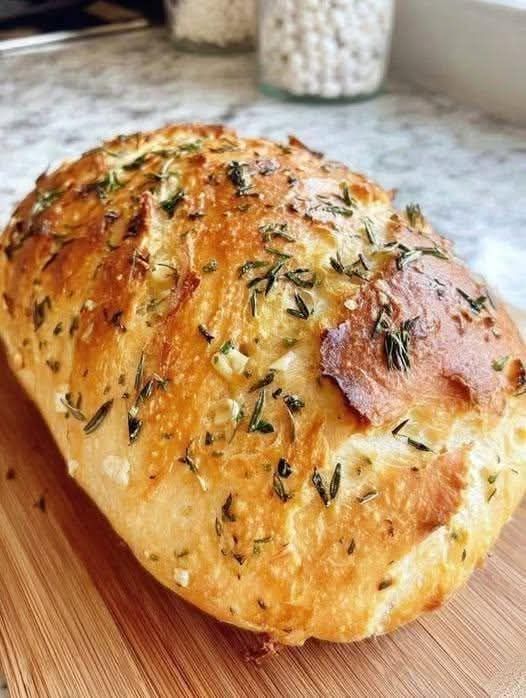
Let the dough sit in the bowl for about two minutes to fully hydrate. Then, using lightly moistened hands, gather the dough and shape it into a smooth, rustic oval or round boule. Place the shaped dough onto a baking sheet lined with high-quality parchment paper. If you want to replicate the artisanal look from sdf43543wesfd353.jpg, use a sharp knife to score a few shallow slashes across the top, then press your fresh rosemary and minced garlic gently into the surface.
Step 4: Bake to Golden Perfection
Slide the baking sheet into an oven preheated to 350°F (180°C). Bake for roughly 50 to 60 minutes. Because there are no eggs or dairy, the bread needs this time to bake all the way through to the center without drying out. You will know it is done when the crust turns a deep, gorgeous golden brown, and the loaf sounds completely hollow when you gently tap the bottom.
Step 5: The Cooling Crucial Step
As tempting as it is to slice into a warm loaf right out of the oven, patience is key here. Gluten-free, vegan breads continue to set their internal structure as they cool. Let your homemade loaf sit undisturbed on a wire cooling rack for at least one full hour. Slicing it too early can result in a gummy texture inside, whereas waiting guarantees a clean, perfect slice every single time.
Pro-Tips for the Best Loaf Every Time
-
Check Your Psyllium Husk: Make sure you are using 100% pure psyllium husk powder. Some brands can cause baked goods to turn a slight shade of purple when heated. While completely safe to eat, using a brand labeled “clear” or “blanched” keeps your bread looking like a traditional white artisan loaf.
-
Do Not Pack Your Measuring Cups: When measuring your flours, fluff them up with a fork first, spoon them into the measuring cup, and level it off with a knife. Packing the flour too tightly can add too much weight to the dough, making it overly dense.
-
Slicing and Storage: Use a sharp, serrated bread knife to cut your slices clean. This bread keeps beautifully in an airtight container at room temperature for up to three days, or in the refrigerator for up to a week.
Freezing for Easy Meal Prep
Because this bread is so cheap and simple to make, it’s highly recommended to double the batch. Slice the extra loaf completely, place pieces of parchment paper between the slices so they don’t stick together, and store them in a freezer-safe bag. Whenever you want a slice, just pop it straight from the freezer directly into your toaster. It crisps up beautifully, bringing back that incredible fresh-baked flavor in just a couple of minutes!


