Step-by-Step Baking Instructions
1. Prepare Your Oven and Pan
Preheat your oven to 350°F (175°C). Grease a standard 9×13-inch glass baking dish with butter or a non-stick cooking spray. If you want to lift the bars out easily for perfect squares, line the pan with parchment paper, leaving a little overhang on the sides.
2. Mix the Base
In a large mixing bowl, combine the dry cake mix, the eggs, and one full can of cherry pie filling. Use a sturdy spatula or wooden spoon to stir them together. Don’t worry about breaking the cherries; they add great color and moisture to the batter. Mix until no dry streaks of flour remain.
3. Layer and Top
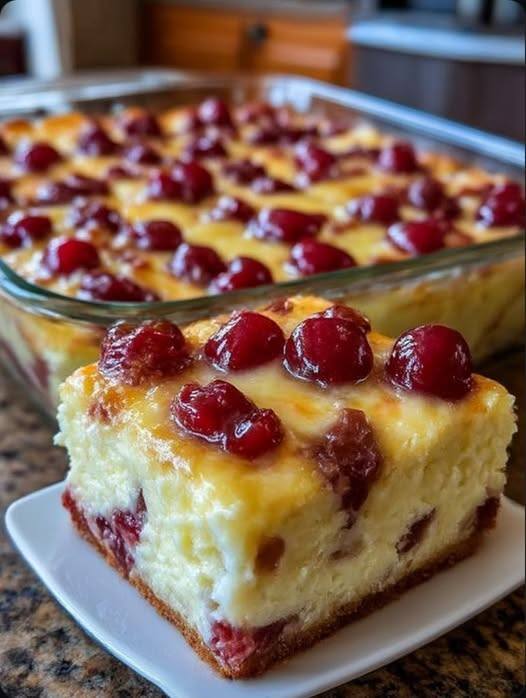
Spread the thick batter evenly into your prepared baking dish. Once the base is level, take the second can of cherry pie filling and drop spoonfuls of the cherries over the top. You can leave them as distinct “dots” (as seen in the photo) or use a knife to gently swirl them into the top layer for a marbled effect.
4. Bake to Perfection
Place the dish in the center rack of the oven and bake for 30 to 35 minutes. You are looking for the edges to turn a light golden brown and for the center to be set (it shouldn’t jiggle like liquid when moved).
5. The Cooling Secret
This is the most important step: Let it cool completely. These bars need time to set up. For the cleanest slices and the best “cheesecake” texture, let them cool at room temperature for an hour, then refrigerate for at least 2 hours before slicing into squares.
Why This Recipe Works
This recipe is a “party favorite” because it defies logic. Even though there is no cream cheese in the ingredient list, the interaction between the eggs and the starch in the cake mix creates a dense, velvety crumb that mimics a high-end cheesecake.
Storage Tips: Because of the fruit and egg content, these bars stay freshest when stored in an airtight container in the refrigerator. They actually taste even better the second day!