
- December 5, 2025
🔪 Step 1: Crafting the Savory Beef Topping
This meaty base is what sets these pizza bites apart from a simple pepperoni version. It’s rich, flavorful, and incredibly satisfying!
-
Heat the Pan: In a large skillet, heat the 1 tablespoon of olive oil over medium-high heat. 🍳
-
Sauté Aromatics: Add the diced onion and cook for about 3-4 minutes until softened and translucent. Add the minced garlic and cook for just 1 minute more until fragrant. (Be careful not to burn the garlic!)
-
Brown the Beef: Add the 1 lb of ground beef to the skillet. Break it up with a wooden spoon and cook until it is fully browned. Drain off any excess grease. 🗑️
-
Simmer the Flavor: Reduce the heat to low. Stir in the 1/2 cup of crushed tomatoes, Worcestershire sauce, dried oregano, dried basil, salt, and black pepper.
-
Perfection Time: Let the mixture simmer gently for 5-7 minutes. This allows the flavors to meld beautifully. You want the mixture to be thick and saucy, not watery.
-
Cool Down: Remove the skillet from the heat and set the beef topping aside to cool slightly. (Important: Placing hot topping on the dough can cause it to sink or become soggy).
(End of Page 1. Continue to Page 2 for Assembly and Baking!)
Page 2: Dough Prep, Assembly, and Baking Instructions
🥖 Step 2: Preparing the Pizza Bases
The secret to making this recipe fast and easy is using canned biscuits! They create the perfect fluffy, yet sturdy, base for our mini pizzas.
-
Preheat & Prep: Preheat your oven to 375°F (190°C). Line a large baking sheet (or two, depending on your batch size) with parchment paper or lightly grease it. This prevents sticking! 🧈
-
Open the Biscuits: Open both cans of the flaky biscuit dough. You should have 16 biscuits in total.
-
Flatten the Dough: Lightly flour your work surface. Take one biscuit and use a rolling pin or the palm of your hand to flatten it into a 4-inch (10 cm) circle. The edges should be a little thicker to create a nice crust. Repeat this process for all 16 biscuits. (Tip: Try to keep the thickness uniform so they bake evenly!)
-
Arrange: Place the flattened biscuit rounds onto the prepared baking sheet, spacing them about 1 inch apart. They will puff up! ☁️
🏗️ Step 3: Assembling the Mini Pizzas
This is where the magic happens and the pizza bites start to take shape!
-
The Saucy Layer: On each biscuit round, spread a small amount of the marinara or pizza sauce. Use about 1/2 to 1 teaspoon per base. You want just enough for flavor without making the base too wet. 🍅
-
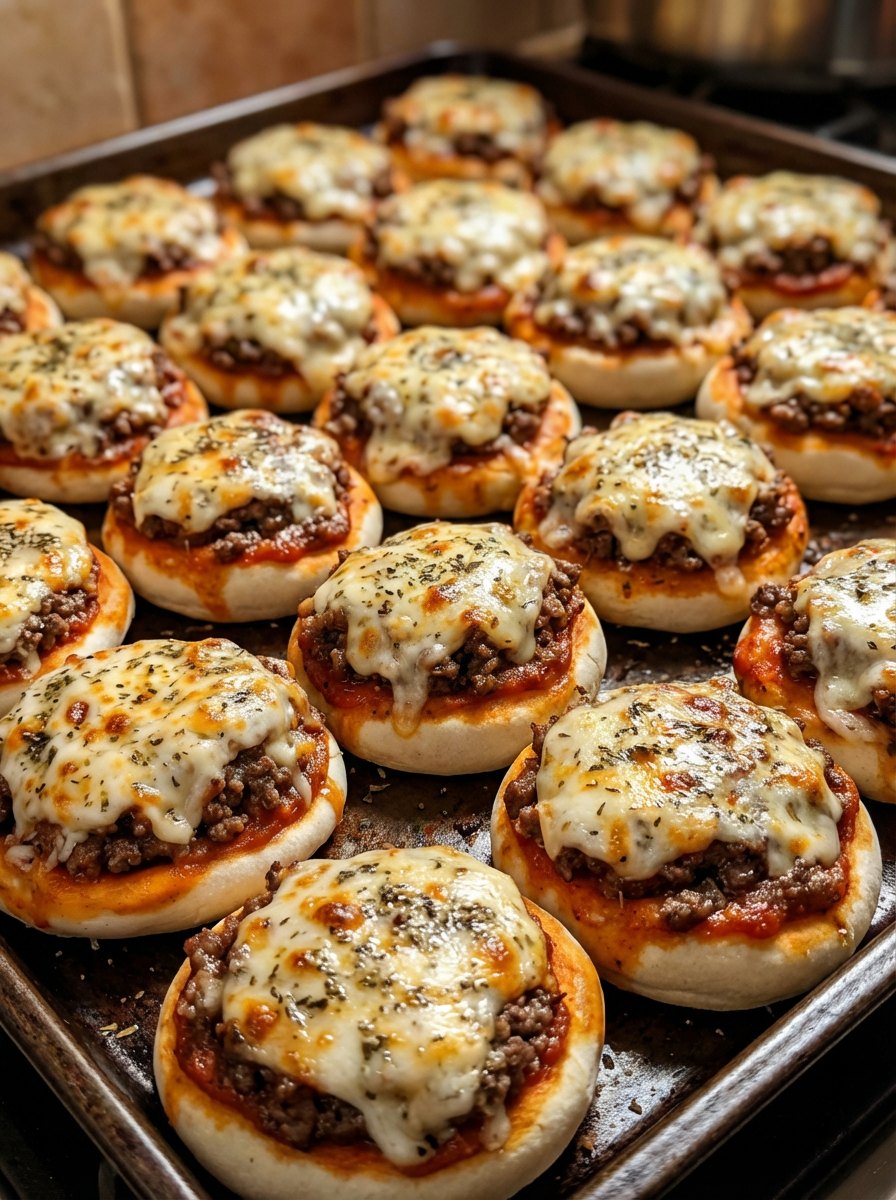
The Beef Core: Spoon a generous, mounded dollop of the cooled Savory Beef Topping onto the center of the sauce. Try to keep the topping centered so the melted cheese holds it all together. (Look at the picture! We want a big, beautiful mound!) ⛰️
-
The Cheesy Crown: Sprinkle a generous layer of shredded mozzarella cheese over the beef topping. Don’t be shy! We want that beautiful, gooey melt. The cheese should just about cover the meat. 👑
🔥 Step 4: Baking to Golden Perfection
The final stretch! Patience is a virtue, but the smell of these baking will make it hard!
-
Bake Time: Place the baking sheet into the preheated oven. Bake for 12-15 minutes.
-
Check for Doneness: The mini pizzas are done when:
-
The biscuit dough base is golden brown and cooked through.
-
The cheese is completely melted, bubbly, and the edges are starting to turn a beautiful golden-brown color. ☀️
-
-
The Finishing Touch: Carefully remove the pan from the oven. Immediately sprinkle the tops with a pinch of dried Italian seasoning or oregano for a beautiful aroma and a polished look (just like in the photo!).
-
Cool & Serve: Let them cool on the pan for about 5 minutes before transferring them to a serving platter. They will be very hot!
🍽️ Step 5: Serving Suggestions
These are great on their own, but serving them with a dipping sauce elevates the experience!
-
Classic Marinara: A bowl of warm marinara sauce is essential for dipping the edges.
-
Ranch Dressing: A cool, creamy counterpoint to the rich beef and cheese. 🥛
-
Garlic Butter: Melted butter mixed with minced garlic and a pinch of parsley—brush on the crust right before serving!
(End of Page 2. Continue to Page 3 for Pro-Tips, Variations, and Storage!)
Page 3: Pro-Tips, Troubleshooting, and SEO Optimization
💡 Pro-Tips for the Perfect Pizza Bites
-
Cool the Topping: This is the most critical tip! A hot topping will melt the cheese too quickly and make the biscuit dough heavy and soggy before it can bake properly. Cool the beef topping completely. 🥶
-
The Dough Edge: When flattening the biscuits, leave the very outer edge slightly thicker than the center. This helps create a defined “crust” that holds the topping without spreading too much.
-
High-Quality Cheese: Opt for whole-milk, low-moisture mozzarella, and shred it yourself if possible. Pre-shredded cheese often contains anti-caking agents that prevent a truly smooth, gooey melt. 🧀
-
Preventing Sticking: Always use a non-stick baking sheet, or better yet, line it with parchment paper for effortless cleanup and perfect removal.
🔄 Recipe Variations & Customization
This recipe is incredibly versatile! Here are a few ways to mix things up:
-
Veggie Lovers: Replace the beef topping with sautéed mushrooms, bell peppers, and zucchini, simmered in the same crushed tomato base. 🍄
-
Spicy Kick: Add a pinch of red pepper flakes to the beef topping or sprinkle some on top of the cheese before baking. 🌶️
-
Italian Sausage: Swap the ground beef for spicy or sweet Italian sausage (remove the casings before browning).
-
Different Cheese: Use a mix of mozzarella and provolone, or top with a sprinkle of grated Parmesan cheese after baking.
🧊 Storage & Reheating
These Mini Pizza Bites are fantastic for making ahead!
-
Storage: Store any leftovers in an airtight container in the refrigerator for up to 3 days.
-
Freezing: You can freeze the baked and cooled pizza bites! Place them on a baking sheet to freeze solid, then transfer them to a freezer-safe bag. They can be stored for up to 3 months.
-
Reheating:
-
From Fridge: Reheat in a 350°F (175°C) oven or toaster oven for about 5-8 minutes until the cheese is melted and the base is crisp. (Microwaving is not recommended as it makes the crust soggy!)
-
From Freezer: Bake from frozen at 350°F (175°C) for 15-20 minutes.
-
🔍 SEO Keywords for Search Engines
-
Mini Beef Pizzas
-
Pizza Bites Recipe
-
Mini Pizzettas with Ground Beef
-
Easy Appetizer Recipe with Canned Biscuits
-
Game Day Snack Ideas
-
Kids’ Dinner Recipe
-
How to Make Pizza Bites
-
Cheesy Beef Bites
Enjoy your incredible batch of Mini Beef and Cheese Pizzas! They are truly the perfect party snack. Happy cooking! 🥳


